Software bundling should be opt-in

According to the FileZilla FAQ:

FileZilla is free open-source software distributed under the terms of the GNU General Public License free of charge.
Basically this means that everyone, including corporate entities, can use FileZilla, including but not limited to private, educational and commercial use.

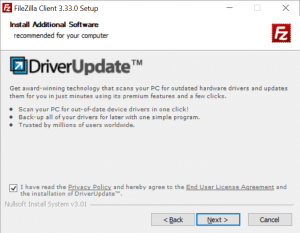
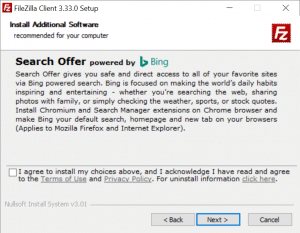
When you install it you have to opt out of at least one, if not two, bundling offers.  While many installers provide you the opportunity to install a bundled offer, I really think that if you are releasing the software as open-source under the GPL, then you should embrace the spirit of the license and make the included bundles opt-in.  And why you are at it, maybe you could add a section to the FAQ on what the funds for the bundles and the website sponsors are used for.

filezilla_optout2-300x233-9578418 filezilla_optout-300x233-9228548

Workaround for HipChat on openSUSE

I recently re-built my work laptop to run openSUSE due to continual crashes of GNOME Shell on my Ubuntu GNOME 17.04 spin.  One of the apps that we use at work is Atlassian’s HipChat client.  HipChat has an artifactory repo where you can download the rpm bundle for use on CentOS, openSUSE, Fedora, etc.  After installing the client I was presented with a blank screen on launching the app.

Read more

Configure OpenDNS for EdgeRouter X

Recently I acquired an EdgeRouter X from Ubiquiti Networks to handle the routing and firewall functions of my home network.  This was prompted by a desire to separate each of my network functions to individual components and to get a better piece of equipment than the run-of-the-mill Comcast rental gear.

After configuring the equiment and updating to the latest firmware, I decided to also configure my network DNS to flow through OpenDNS instead of Comcast DNS.  This also allowed me to configure content filtering so that my grandchildren wouldn’t accidentally get shuffled into some crazy website instead of Disney Junior.

The steps to configure this are not quit as simple as on some other setups.  OpenDNS didn’t have any instructions on this and sent inquiring users to the Ubiquiti Community Forums.  Here is the method that I used:

Step One – Open main system configuration

In the main windows of the web interface for the EdgeRouter X, click on the System button towards the bottom left of the window. This will bring up the main system configuration screen.


Step Two – Configure the System Name Server values

Add the first OpenDNS IP address in the visible field.  Click the Add New button to add a second field, then enter the second OpenDNS IP address into that field.  Scroll down to the bottom of the System settings and click the Save button.

Step Three – Login to the command line interface

In the upper right section of the admin interface, click on the CLI button to open a window to the command line interface (aka cli).  When the window opens, login using the same username and password you use for the web interface (Security Tip: please take the time to change the password from the default…)

Step Four – Update the DNS Fowarding

After logging into the cli, you need to enter the following commands:

configure
set service dns forwarding system
commit
save
exit
exit

What this does is to alter the functionality of the built-in DNS forwarding service to use the system name server values instead of the values from your ISP source (in my case an Arris SB6190 cable modem connected to Comcast).

After you have completed the above steps, then you can easily control the content filtering on your network using the OpenDNS tools.
QuickReview: LIFX White 800 WiFi LED Smart Bulb

Lately I have been dipping my toe into the pool of home automation and smarthome technologies.  While I have been interested in having a smarthome ever since I watched my first few episodes of the SyFy channel show Eureka.  My interest was advanced even more by Google I/O 2016 and the demo of Google Assistant.

So a few months ago I ventured into this new world of technology (new for me at least) cautiously by purchasing a pair of the LIFX White 800 smart bulbs that were on sale at Walmart due to the release of the LIFX Generation 3 A19.

I found that the Android app was very easy to configure, and that I could easily add the light bulbs to multiple Android devices.  I was disappointed to find that they were not immediately compatible Siri on my wife’s iPhone due to the lack of a suitable homekit bridge/hub.  This was remedied easily enough by configuring the open-source NodeJS server homebridge and a plugin (homebridge-lifx-lan or homebridge-lifx)  to connect the light bulbs to the Apple Home application.

Adding the lightbulbs to the LIFX app on my Pixel was fairly straight forward and went off without a hitch.

I have found the light bulbs easy enough to manage.  The hue range and brightness are quite suitable for the application, namely the nightstand lights in the master bedroom and I would definitely recommend these to anyone that doesn’t have a need for more than just white led light bulbs.

ESXi Embedded Host Client Overview

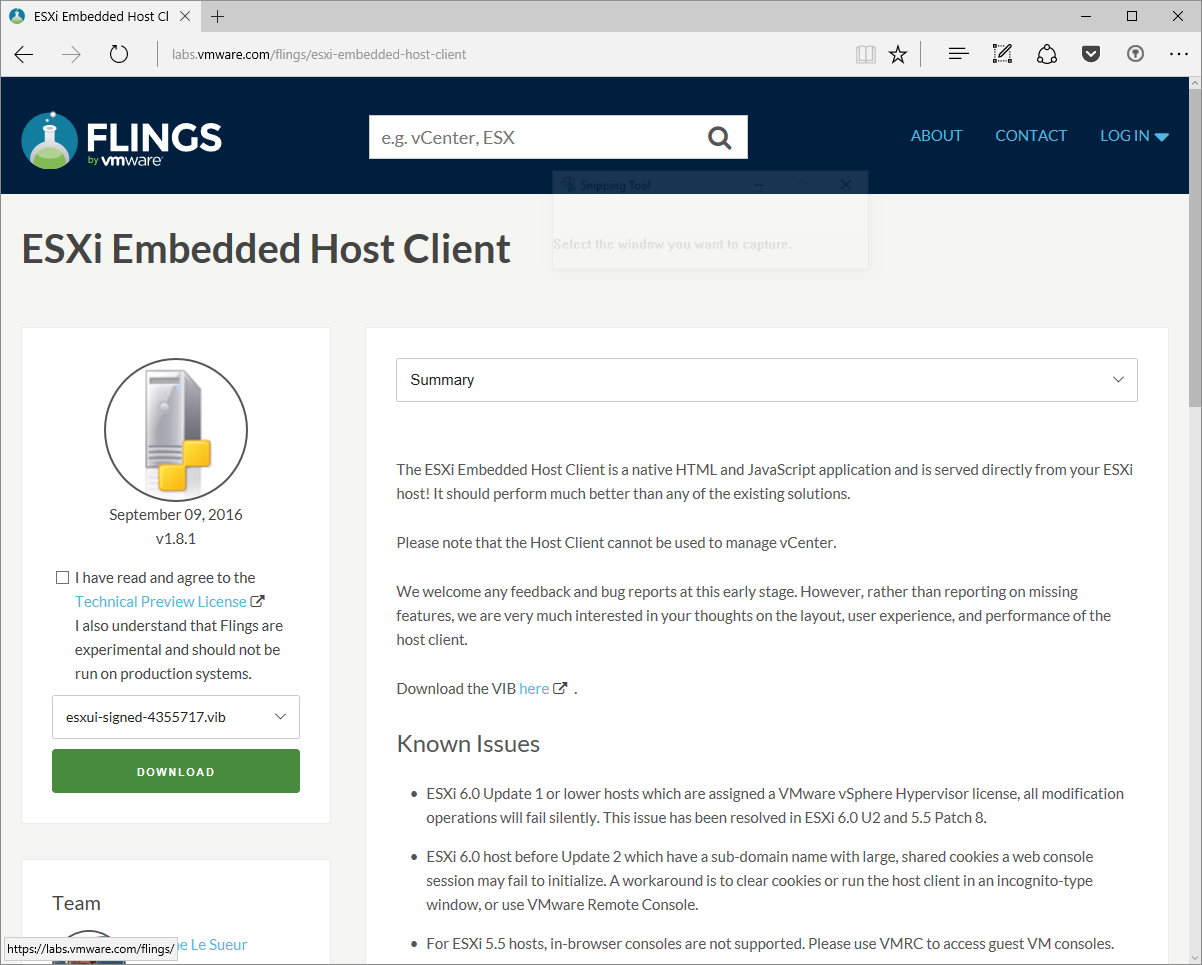
As I have begun to see numerous rumors in the VMware forums that the next major release will deprecate the usage of the vSphere thick client (and the simple fact that VMs created using the most recent extensions include features that cannot be managed with the desktop client) I decided to take the plunge and install the HTML5 fling host client on my ESXi host.
The fling can be downloaded from the VMware Labs site. The standard caveat applies to this fling like anything else that you install from VMware Labs:

I also understand that Flings are experimental and should not be run on production systems.

Read more

Configure Google Authenticator on CentOS 7

Image of laptop with hand holding a skeleton key extending outwards through the display.

Intro

As part of the rebuild on my Plex Media Server using CentOS 7, I had intended to configure Google Authenticator but hadn’t gotten around to doing it yet.  As I got into the process recently I discovered that many of the steps that I had used when configuring my CentOS 6 Digital Ocean droplet were out of date to the point of uselessness.

I also discovered that most of the guides that I found either relied on the older 1.0 code release which was also outdated or used a unknown RPM repo.  As such I decided to write up the process that I followed to use the code downloaded from the official GitHub repository.

NOTE: If you are doing this in an enterprise setting, it is likely that your company has particular settings and restrictions that you may need to adhere to (e.g., not running things as the root user). Also, please note that all of my examples use the CentOS defaults unless specifically noted.

Read more

Switch your domain registrar to Hover

6722541653_98d7b2b922_m-7197801There is an adage that you should vote with your wallet when you are unhappy with a particular business or their practices.  Do we do this as much as we should?  Probably not.

Taking this to heart,  I have decided that I will try to apply this to the usage of my electronics and gadget stuff.  So the first thing I chose to do was to switch my domain registration from using NameCheap to using Hover.  There were several usage reasons, like support for the TOTP/HOTP system for two-factor authentication instead of relying on SMS messages.

But there are some other reasons, like the support for causes that I feel are worthwhile.  Here are just a few that Hover is a patron of:

So if you own a domain or two, or you work somewhere that does, think about switching your registration to Hover and help support not only your account’s security but also some great organizations.

Gratuitous Recommendation Link: https://hover.com/Ems0HmPv

Full disclosure: I work at Web.com and they are the parent company of Register.com and Networksolutions.com, two really large domain registration companies, but I still prefer Hover.

RHEL7 and ncat changes

One of the tools that I use on a regular basis to test network connectivity updates is the “z” option of netcat.  Apparently when RedHat rolled out the latest version of their distribution of RedHat Enterprise Linux (RHEL) they decided to move to using the nmap-ncat package instead of the nc package.  The command options a very different.

So when attempting to test single port like I would have under previous releases I now use the following syntax:

# echo | nc -w1 $host $port >/dev/null 2>&1 ;echo $?

If the result that is returned is a zero then you have successfully connected to the remote host on the desired port. This also applies to CentOS 7 since it is a “clone” or copyleft port of the RHEL7 binaries.

Dear Comcast: You Suck

Editorial Note: Apparently Comcast really would prefer that people not use the term data cap when referring to the limitations being placed on their customers data usage and would much rather prefer that we use the term data usage plan or data threshold, however, I don’t really care. 🙂

Dear Comcast,

I would like to go on record as saying that you suck.  I recognize that you are a for profit company and that you would like to make a profit on the services that you provide.  I even think that having your company make a profit is a good thing because that enables you to pay your employees so that they can put food on their tables and afford to pay the fees for their children to participate in Little League baseball and other such childhood activities.

Your data usage cap system is bogus.  According to the data available on your own website you have eight (8) different trial markets where you have rolled out data caps since 2012:

  • August 1, 2012: Nashville, Tennessee – 300GB cap
  • October 1, 2012: Tucson, Arizona – 3 tiers (300GB, 350GB, 600GB)
  • August 22, 2013: Fresno, California – Economy Plus option added
  • September 1, 2013: Savannah, Georgia; Central Kentucky; Jackson, Mississippi – 300GB
  • October 1, 2013: Mobile, Alabama; Knoxville, Tennessee.
  • November 1, 2013: Huntsville, Alabama; Augusta, Georgia; Tupelo, Mississippi; Charleston, South Carolina; Memphis, Tennessee – 300GB cap
  • December 1, 2013: Atlanta, Georgia; Maine – 300GB cap
  • October 1, 2015: Fort Lauderdale, the Keys and Miami, Florida – 300GB cap plus $30 option for increasing to  unlimited

In fact, your page on this even refers to these as “trial start dates” which to a reasonably minded person would imply that they have an end date as well, however to the best of my knowledge (as well as the comments made by a customer support representative) there is no plan to end these trials OR any plan to actually collapse them into a single cohesive plan that applies to your entire service.

Read more

Massive Numbers of Chrome Helper Messages in system logs

Today when attempting to figure out why Google Hangouts would not start on my Mac after the application was re-enabled due to a permissions change, I noticed a large number of messages like the following:

6/10/15 10:20:14.000 AM kernel[0]: Google Chrome He (map: 0xffffff804da160f0) triggered DYLD shared region unnest for map: 0xffffff804da160f0, region 0x7fff99a00000->0x7fff99c00000. While not abnormal for debuggers, this increases system memory footprint until the target exits.

After some research I found that this is a reported issue in the bug tracker for Chromium.  At first I thought that maybe this was the cause of the problem I was having but that turned out to not be the case, simply removing the Hangouts app in Chrome and re-adding it fixed my issue.  However, the sheer number of these errors makes the log a bit unwieldy.  It turns out that there is a way to hide all these messages (thanks to the commenter in the Chromium bug thread!):

[code language=”bash” light=”true”]sudo sysctl -w vm.shared_region_unnest_logging=0[/code]

While it doesn’t help at all with Chrome’s memory issues or other UI issues on Mac OS X, it is rather nice to hide all those spurious messages from the system log.