![]() If you have just installed the most recent release of the virtualization platform Proxmox, you might have noticed the that steps to disable the subscription pop-up dialog have changed, well, other than actually purchasing a subscription, I suppose. I have chosen to not purchase a subscription for the same reason I don’t have one for VMware’s vSphere Hypervisor, I am not running this in a production setting that requires paid support or premium features. The following steps will disable the subscription pop-up.
If you have just installed the most recent release of the virtualization platform Proxmox, you might have noticed the that steps to disable the subscription pop-up dialog have changed, well, other than actually purchasing a subscription, I suppose. I have chosen to not purchase a subscription for the same reason I don’t have one for VMware’s vSphere Hypervisor, I am not running this in a production setting that requires paid support or premium features. The following steps will disable the subscription pop-up.
Backup the javascript file
The pop-up contents, and whether or not are displayed, are controlled by a function in a javascript file. The first step should always be to make a backup, just in case Murphy rings your doorbell.
root@pve:~# cd /usr/share/pve-manager/js/
root@pve:/usr/share/pve-manager/js# cp -p pvemanagerlib.js pvemanagerlib.js_backup
Edit the javascript file
Open the pvemanagerlib.js file in your favorite editor. If this is a vanilla, unmodified installation, skip to line 850. If this is not the first time that you have edited the file, search for the first occurrence of the following snippet, which will be in the function that we need to alter:
gettext('No valid subscription')
The text of the check for the function should be altered so that the conditional for the check reads as follows:
before
if (data.status !== 'Active') {
after
if (false) {
Notes
As I stated in the original paragraph, the specifics apply to v. 5.1-3 and that the location of the file has changed from previous versions. A good way to find the file is to use the locate command, which you will have to install first:
root@pve:~# apt-get update
Ign:1 http://ftp.us.debian.org/debian stretch InRelease
Get:2 http://security.debian.org stretch/updates InRelease [94.3 kB]
Get:3 http://ftp.us.debian.org/debian stretch Release [118 kB]
Get:4 http://ftp.us.debian.org/debian stretch Release.gpg [2,434 B]
Get:5 http://security.debian.org stretch/updates/main amd64 Packages [374 kB]
Get:6 http://ftp.us.debian.org/debian stretch/main amd64 Packages [7,122 kB]
Get:7 http://security.debian.org stretch/updates/main Translation-en [165 kB]
Get:8 http://security.debian.org stretch/updates/contrib amd64 Packages [1,776 B]
Get:9 http://security.debian.org stretch/updates/contrib Translation-en [1,759 B]


root@pve:~# apt-get install mlocate
Reading package lists... Done
Building dependency tree
Reading state information... Done
The following NEW packages will be installed:
  mlocate
0 upgraded, 1 newly installed, 0 to remove and 85 not upgraded.
Need to get 96.5 kB of archives.
After this operation, 495 kB of additional disk space will be used.
Get:1 http://ftp.us.debian.org/debian stretch/main amd64 mlocate amd64 0.26-2 [96.5 kB]
Fetched 96.5 kB in 0s (315 kB/s)
Selecting previously unselected package mlocate.
(Reading database ... 40185 files and directories currently installed.)
Preparing to unpack .../mlocate_0.26-2_amd64.deb ...
Unpacking mlocate (0.26-2) ...
Setting up mlocate (0.26-2) ...
update-alternatives: using /usr/bin/mlocate to provide /usr/bin/locate (locate) in auto mode
Adding group `mlocate' (GID 115) ...
Done.
Processing triggers for man-db (2.7.6.1-2) ...
root@pve:~# updatedb
root@pve:~# locate pvemanagerlib.js
/usr/share/pve-manager/js/pvemanagerlib.js
/usr/share/pve-manager/js/pvemanagerlib.js_backup
As you can see the mlocate package makes finding the file so much easier.
 As the whole GDPR craze has hit my place of employment, I decided to look into an easy method for to add a privacy policy and cookie policy to my WordPress site.
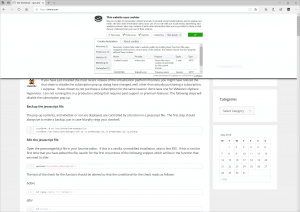 Screenshot of slide-down panel with default settings.


 As the whole GDPR craze has hit my place of employment, I decided to look into an easy method for to add a privacy policy and cookie policy to my WordPress site.