Editorial Note: Apparently Comcast really would prefer that people not use the term data cap when referring to the limitations being placed on their customers data usage and would much rather prefer that we use the term data usage plan or data threshold, however, I don’t really care. 🙂
Dear Comcast,
I would like to go on record as saying that you suck. I recognize that you are a for profit company and that you would like to make a profit on the services that you provide. I even think that having your company make a profit is a good thing because that enables you to pay your employees so that they can put food on their tables and afford to pay the fees for their children to participate in Little League baseball and other such childhood activities.
Your data usage cap system is bogus. According to the data available on your own website you have eight (8) different trial markets where you have rolled out data caps since 2012:
- August 1, 2012: Nashville, Tennessee – 300GB cap
- October 1, 2012: Tucson, Arizona – 3 tiers (300GB, 350GB, 600GB)
- August 22, 2013: Fresno, California – Economy Plus option added
- September 1, 2013: Savannah, Georgia; Central Kentucky; Jackson, Mississippi – 300GB
- October 1, 2013: Mobile, Alabama; Knoxville, Tennessee.
- November 1, 2013: Huntsville, Alabama; Augusta, Georgia; Tupelo, Mississippi; Charleston, South Carolina; Memphis, Tennessee – 300GB cap
- December 1, 2013: Atlanta, Georgia; Maine – 300GB cap
- October 1, 2015: Fort Lauderdale, the Keys and Miami, Florida – 300GB cap plus $30 option for increasing to unlimited
In fact, your page on this even refers to these as “trial start dates” which to a reasonably minded person would imply that they have an end date as well, however to the best of my knowledge (as well as the comments made by a customer support representative) there is no plan to end these trials OR any plan to actually collapse them into a single cohesive plan that applies to your entire service.
Now before I get into the real meat of my complaint with your pricing plans, let me go on record as saying that I have no real problem with a metered usage system for data bandwidth. I pay for a metered system with electricity usage, as do most consumers (unless maybe you can afford to own a skyscraper with your name on it). If my usage of power goes up, then so does my bill. If my usage goes down, then so does my bill. However, my power bill is not likely to increase at that rate my cable bill will for my bandwidth usage.
The problem I have with my data cap (or as you would say data usage plan) is that I have no choice in plans. If all you get is one option then quit calling it a choice. If you want to call it a choice, then give me one! I am fine with paying an additional $30 a month for the option to not have a cap. Will I use less than my current 300GB cap some months thus giving you extra money in your pocket? Sure I will, but I am ok with that. I currently pay for 20GB of wireless data on my cell phone plan and most months I don’t even hit 10GB of usage, but I am happy to pay for the extra every month so that on the months that I am travelling and need to use my phone as a hotspot that I won’t suddenly find that I have an additional hit of $80-$100 on my bill due to that. Give me the option to pay for a plan that will allow me to meet my usage needs at the high end and budget for that and I will happily pay it.
Oh and the idea that 300GB of data is actually a reasonable place to start your cap is laughable. With more and more consumers, even in the rural South where I live, moving to services like Netflix and Hulu for media consumption, your insistence that 300GB is a good median limit is just making your service ripe for competition. Take a look at places where there is actual competition and you will see what I am talking about (of course the fact that Google and AT&T apparently don’t care about consumers living outside of a rural area puts the lie to their claim of offering competition).
On October 1, 2015, you flipped the billing switch that allows for customers in three markets in Florida to pay $30 more an have no data cap. Why not just flip that switch for the whole country? Better yet, why not just up my bill by $30 and remove the cap completely? Want to just switch to a completely metered plan? Fine, then do it, but while you are at it make the price per GB reasonable. A recent summer 2015 survey from the Georgia PSC showed that I paid roughly 11.7 cents per kwh to my rural electric municipal coporation, Satilla REMC for a 1000 kWh block and I think that they probably have a higher cost per kwh than you do per gigabyte. If I breakdown my cable bill, I pay roughly 25 cents per gigabyte for my data. When I exceed my data cap, I get charged an overage fee of $10 for every 50GB chunk, which means that whether I use 1GB extra or 50GB extra, I get charge the extra $10. That breaks down to 20 cents per gigabyte. If you can charge me $.20 for the overage data, then why not charge me $.20 for the original 300GB? So instead of my data portion costing me $76 it would cost $60. And while we all know that I am being overcharged per gigabyte, let’s just be honest and up front and try not to gouge the only customers you have. For example, a 2011 article in the Globe and Mail talked about this very issue in Canada and determined that while Bell was selling data to wholesale customers at $4.25 per 40GB block (that’s Canadian dollars and it breaks down to approximately $0.10 Canadian per gigabyte), yet the same service was costing consumers $1 or more per gigabyte. I haven’t seen numbers for the costs in the US per gigabyte, but I am willing to bet that it’s not that much more.
So why don’t you do everyone a favor treat all your customers the same? Quit dithering around on the usage cap terms and give us, the consumers that you claim to care about, actual choice in data plans. It’s a crazy thing, but when you start treating your customers like people that are worth something then it’s just possible that you might not be vilified in the press every day.
And while we are at it, thanks oh so much for silently increasing my download rate from 50Mbps to 75Mbps. I am sure that at some point in the future you will just up my rate to make up for the speed increase without actually changing my data cap. So yeah, thanks a lot for that.
And not that it matters, but yeah, that FCC complaint? That was me.
Sincerely,
Andrew Fore
 As the whole GDPR craze has hit my place of employment, I decided to look into an easy method for to add a privacy policy and cookie policy to my WordPress site.
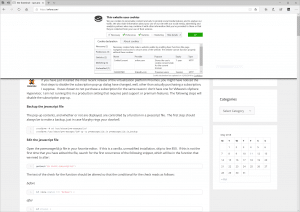 Screenshot of slide-down panel with default settings.