Setting package publisher in Solaris 11

During the installation and setup of my new Solaris 11 Automated Installer host, I ran into a situation where even though I was specifying both the origin to remove AND the origin to add, the OS refused to allow me to perform both options in the same command.  While you should be able do this, I ended up having to remove the default system configured publisher and then adding the new local IPS repository as the publisher.

This is what the default publisher was configured for:

root@qa1jumpstart01:~# pkg publisher
PUBLISHER                   TYPE     STATUS P LOCATION
solaris                     origin   online F http://pkg.oracle.com/solaris/release/
root@qa1jumpstart01:~# pkg publisher solaris

            Publisher: solaris
                Alias: 
           Origin URI: http://pkg.oracle.com/solaris/release/
              SSL Key: None
             SSL Cert: None
          Client UUID: <redacted>
      Catalog Updated: October  6, 2015 02:41:00 PM 
              Enabled: Yes

Here is the command that was part of the Oracle guide How to Get Started Customizing and Configuring Systems Using the Automated Installer in Oracle Solaris 11.1 which didn’t work for me:

root@qa1jumpstart01:~# pkg set-publisher –G '*' -g http://10.202.46.80 solaris
pkg set-publisher: only one publisher name may be specified
Usage:
        pkg set-publisher [-Ped] [-k ssl_key] [-c ssl_cert]
            [-g origin_to_add|--add-origin=origin_to_add ...]
            [-G origin_to_remove|--remove-origin=origin_to_remove ...]
            [-m mirror_to_add|--add-mirror=mirror_to_add ...]
            [-M mirror_to_remove|--remove-mirror=mirror_to_remove ...]
            [-p repo_uri] [--enable] [--disable] [--no-refresh]
            [--reset-uuid] [--non-sticky] [--sticky]
            [--search-after=publisher]
            [--search-before=publisher]
            [--search-first]
            [--approve-ca-cert=path_to_CA]
            [--revoke-ca-cert=hash_of_CA_to_revoke]
            [--unset-ca-cert=hash_of_CA_to_unset]
            [--set-property name_of_property=value]
            [--add-property-value name_of_property=value_to_add]
            [--remove-property-value name_of_property=value_to_remove]
            [--unset-property name_of_property_to_delete]
            [--proxy proxy to use]
            [publisher]

I tried several different variations of the one line command, however I was met with the same lack of success. In order to achieve the desired result where the local IPS repository was set up for publisher name solaris I had to do an unset of the existing repo and then a set to configure my new repo.

root@qa1jumpstart01:~# pkg unset-publisher solaris
Updating package cache                           1/1 
root@qa1jumpstart01:~# pkg publisher
PUBLISHER                   TYPE     STATUS P LOCATION
root@qa1jumpstart01:~# pkg set-publisher -g http://<redacted> solaris
root@qa1jumpstart01:~# pkg publisher
PUBLISHER                   TYPE     STATUS P LOCATION
solaris                     origin   online F http://<redacted>/
root@qa1jumpstart01:~# pkg publisher solaris

            Publisher: solaris
                Alias: 
           Origin URI: http://<redacted>/
              SSL Key: None
             SSL Cert: None
          Client UUID: <redacted>
      Catalog Updated: October  6, 2015 07:45:07 PM 
              Enabled: Yes


Proxmox Package Repositories for non-subscription installs

proxmox-logo-150x150-2415287If you ran across my previous post about disabling the Proxmox no subscription pop-up, you might also be wondering why you get an alert on the console regarding the scheduled update job.  The reason that this shows up is that the apt-get update job returns an error code for one of the Proxmox Enterprise repos.

The fix is relatively simple, just reconfigure your sources.list.d contents to not have the pve-enterprise repo, but instead to have the pve-no-subscription repos enabled instead.  The wiki has a nice article on the various package repos used for Proxmox.

Please note that the entry for the pve-no-subscription repo merges the sources.list and the sources.list.d file into one.

Privacy and cookie policy

As the whole GDPR craze has hit my place of employment, I decided to look into an easy method for to add a privacy policy and cookie policy to my WordPress site.
Adding a privacy policy is pretty simple, all you have to do is to create a new page with the policy on it.  Simple right? Well, it turns out that the devil is in the details as normal.  After a few minutes of research, I found a nice site with a template-based policy generator.  The site, Privacy Policy Template, is pretty self-explanatory.  The code for the template is very easy to edit after you generate the code.  This provides a great starting point for sites that need more information, but also a nice final product for blogs like this one that don’t really deal with any user data other than the owner.

The other shoe is a cookie policy.  Towards this end I used the CookieBot service and the accompanying plugin.  It is a paid service if you have a large number of pages, but if you have a site with 100 sub-pages or less then the service is free.  Be aware that for the purposes of billing and scanning, CookieBot treats each post or page as a separate item.  The pricing structure is really quite reasonable given the capabilities of the service.  For example, this site has a total of 121 pages and posts, so they automatically upgraded my account from free to a 30-day free trial.  Until I hit 500 pages/posts, the cost is only $10/month, which in the overall scheme of things is not that bad at all.

cookiebot-300x212-3902402
Screenshot of slide-down panel with default settings.

The initial scan can take as long as 24 hours to be generated, however that all depends on the size of the site being scanned.  The cookie categories and reports are automatically created for you, however you can also customize the panel with custom cookies and categories, as well customizing the CSS to control the look and feel of the panel.  I choose to start out with defaults only.  The image to the right is what my site looks like after the initial report was generated.

I also received a report in the inbox configured for the account with details on what was found in the scan and which cookies were treated as falling into the pre-defined categories.  For example, the scan found two cookies that were designated as necessary for the site to function.  There were also items found in the preferences and statistics categories.

While I don’t really feel that it is necessary for me to even have a privacy policy or cookie consent feature, I have decided to do it anyway simply out of an attitude of prevention, due to the political climate surrounding personal data collection and the like. (Thanks, Mark Zukerberg, as well as your friends at Cambridge Analytica.)

While these two services are by no means the only ones out there, I found them to be the easiest and simplest to implement.

(The featured image is copyright of HarperCollins Publishers)

Disable subscription pop-up in Proxmox v.5.1-3

proxmox-logo-150x150-4148157If you have just installed the most recent release of the virtualization platform Proxmox, you might have noticed the that steps to disable the subscription pop-up dialog have changed, well, other than actually purchasing a subscription, I suppose.  I have chosen to not purchase a subscription for the same reason I don’t have one for VMware’s vSphere Hypervisor, I am not running this in a production setting that requires paid support or premium features. The following steps will disable the subscription pop-up.

Backup the javascript file

The pop-up contents, and whether or not are displayed, are controlled by a function in a javascript file.  The first step should always be to make a backup, just in case Murphy rings your doorbell.

root@pve:~# cd /usr/share/pve-manager/js/
root@pve:/usr/share/pve-manager/js# cp -p pvemanagerlib.js pvemanagerlib.js_backup

Edit the javascript file

Open the pvemanagerlib.js file in your favorite editor.  If this is a vanilla, unmodified installation, skip to line 850.  If this is not the first time that you have edited the file, search for the first occurrence of the following snippet, which will be in the function that we need to alter:

gettext('No valid subscription')

The text of the check for the function should be altered so that the conditional for the check reads as follows:

before

if (data.status !== 'Active') {

after

if (false) {

Notes

As I stated in the original paragraph, the specifics apply to v. 5.1-3 and that the location of the file has changed from previous versions.  A good way to find the file is to use the locate command, which you will have to install first:

root@pve:~# apt-get update
Ign:1 http://ftp.us.debian.org/debian stretch InRelease
Get:2 http://security.debian.org stretch/updates InRelease [94.3 kB]
Get:3 http://ftp.us.debian.org/debian stretch Release [118 kB]
Get:4 http://ftp.us.debian.org/debian stretch Release.gpg [2,434 B]
Get:5 http://security.debian.org stretch/updates/main amd64 Packages [374 kB]
Get:6 http://ftp.us.debian.org/debian stretch/main amd64 Packages [7,122 kB]
Get:7 http://security.debian.org stretch/updates/main Translation-en [165 kB]
Get:8 http://security.debian.org stretch/updates/contrib amd64 Packages [1,776 B]
Get:9 http://security.debian.org stretch/updates/contrib Translation-en [1,759 B]

<.. snip ..>

root@pve:~# apt-get install mlocate
Reading package lists... Done
Building dependency tree
Reading state information... Done
The following NEW packages will be installed:
  mlocate
0 upgraded, 1 newly installed, 0 to remove and 85 not upgraded.
Need to get 96.5 kB of archives.
After this operation, 495 kB of additional disk space will be used.
Get:1 http://ftp.us.debian.org/debian stretch/main amd64 mlocate amd64 0.26-2 [96.5 kB]
Fetched 96.5 kB in 0s (315 kB/s)
Selecting previously unselected package mlocate.
(Reading database ... 40185 files and directories currently installed.)
Preparing to unpack .../mlocate_0.26-2_amd64.deb ...
Unpacking mlocate (0.26-2) ...
Setting up mlocate (0.26-2) ...
update-alternatives: using /usr/bin/mlocate to provide /usr/bin/locate (locate) in auto mode
Adding group `mlocate' (GID 115) ...
Done.
Processing triggers for man-db (2.7.6.1-2) ...
root@pve:~# updatedb
root@pve:~# locate pvemanagerlib.js
/usr/share/pve-manager/js/pvemanagerlib.js
/usr/share/pve-manager/js/pvemanagerlib.js_backup

As you can see the mlocate package makes finding the file so much easier.

Software bundling should be opt-in

According to the FileZilla FAQ:

FileZilla is free open-source software distributed under the terms of the GNU General Public License free of charge.
Basically this means that everyone, including corporate entities, can use FileZilla, including but not limited to private, educational and commercial use.

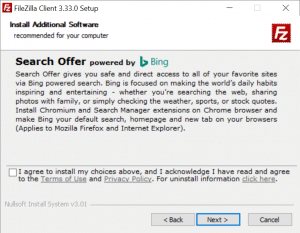
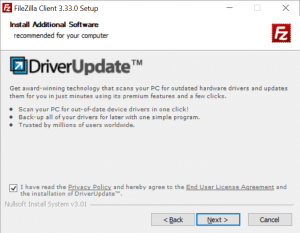
When you install it you have to opt out of at least one, if not two, bundling offers.  While many installers provide you the opportunity to install a bundled offer, I really think that if you are releasing the software as open-source under the GPL, then you should embrace the spirit of the license and make the included bundles opt-in.  And why you are at it, maybe you could add a section to the FAQ on what the funds for the bundles and the website sponsors are used for.

filezilla_optout2-300x233-9578418 filezilla_optout-300x233-9228548